Posts Tagged ‘bmw’

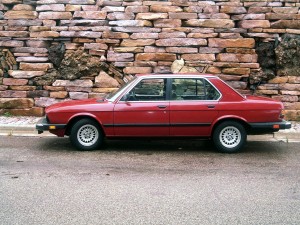
BMWotD – 28,000km e28 M535i

Thursday, January 3rd, 2019

This ad is just what I was looking for… Same model as my car, an M535i, and the same exterior paint & interior that mine was originally built with, Diamant Schwarz over Anthracite cloth. At some point the interior on mine was swapped for black leather, which I like just fine, but this is marvelous reference material in case I want to replace the worn leather that’s in it with something closer to the original Anthracite cloth upholstery. Given the cost of a leather interior refresh these days, refreshing things as it was originally built might be the less expensive option!

But the ad by itself is gold just to see the photos of this car; it’s a beauty!  Only 28,000 kilometers on the clock, and everything looks factory fresh. I’d love to have my car look this good, but given that I’m already slightly afraid to drive it without it looking perfect, it might never come out of its cocoon.

(more…)

BMWotD – 1995 e34 5 series V12 6spd Conversion

Tuesday, October 27th, 2015

00v0v_4teIUbBowsh_600x450

Here’s a unique car that is up for sale in the Burlington, KY, area. The owner/seller could just as well call it a 550i; it’s a 5-series with a 5-liter V12 engine under the hood.

00606_i4941Wlvahd_600x450
(more…)

BMWotD — 1984 Albina B9 3.5

Wednesday, February 20th, 2013

It’s been a while since I posted a BMW of the Day, and this one caught my fancy. Price; stratospherically out of reach at $39,990. But for this particular example, it’s probably worth it. An extremely well done restoration, and it doesn’t look like it’s been driven much at all since then. Cars are not made for sitting in garages looking pretty, but I’d be afraid to drive this one. Part of me would totally do the Ferris Beuller thing with it, but Cameron would be there holding me back, big time.

Enough of my blabbing; I don’t need to extol the virtues of the e28 platform any more than I already have, and Alpina has already been discussed as well (although this one doesn’t have the super-go-fast turbo option), so let’s just jump to the gallery, shamelessly borrowed from the dealer, Enthusiast Auto Group. I don’t think they’ll mind me spreading the word around a little more.
(more…)

BMWotD — Chris Harris on the M5

Thursday, May 24th, 2012

Confession time; I have no idea who Chris Harris is or why I found this video of his, but what I do know is that he is dead on about the M5. Some day…

A Cheapskate’s Paint Job — The Final Product

Thursday, August 20th, 2009

This is the third and maybe final installment in my Cheapskate’s Paint Job series (click here for Part 1, and here for Part 2.) One thing is for sure; the “$50 Paint Job” is a bit of a misnomer; it’s a paint job alright, but I’m pretty sure I passed the $50 mark not too long after buying the paint for it. I didn’t keep very close track of things, but when it was all said & done, the paint & materials for the job cost somewhere in the neighborhood of $200. Still far cheaper than a professional paint job, but $50 just wouldn’t cut it! So I’ll just call it The Cheapskate’s Paint Job®!


The car is nearly complete — only a few niggling details to button up — and I have to say I’m impressed with the results. I am by no means an autobody guy, but I do know a decent paint job when I see one, and this one shines like a professionally painted car. And that’s with no clearcoat and no wax on it. There are little issues galore with the paint job, most of them related to my crappy prep job (which is directly related to my crappy/nonexistent autobody skills), and my inexperience with the entire process, and my rush to finish it up in the last week or so.

But the final product proves to me at least that the concept and process is sound, and can yield a nice looking paint job for someone on a tight budget but has a good measure of patience and some spare time. Another thing I like about this process is that repairing scratches or dings or dents should be much less painful. One of the things that happened to me is that the mystery of auto finishing is gone; it’s no longer a black art in my mind. If something goes wrong with it, I know what went into getting it to look the way it does, and repairing it won’t be as monumental a task in my mind.

I can also say that the next time I take on a job like this, it’ll be killer. Will I take on another job like this? Mmmmm… Not in the foreseeable future, but if the need presents itself, and I don’t want to spend thousands of dollars on the car… And I have a better situation for garage space… And I have nothing better to do with a few weeks of my spare time… I might consider it. But not any time soon unless I want to be minus a wife!

The time involved was the biggest issue for me, but thankfully I had a spare car sitting in front of the house that I could use while the 528 was off the street. I don’t remember exactly what day I started this job, but I know it was around the beginning of July — about six weeks ago. It didn’t exactly take that long to complete, because there was a lot of downtime/thinking time/research time thrown in there, noodling out how to accomplish whatever the next step was. It’s definitely not a project to take on when you don’t have alternative transportation of some sort. If I were to do it again, I think I could be done — start to finish — in about a week. If I didn’t get sidetracked or distracted. As if that would ever happen.

The Rustoleum paint turned out pretty well, but one thing that might be an obstacle for some people is the limited number of colors, and the fact that there are no metallic colors; just solid colors. While I was painting I wondered whether this method would maybe work with standard automotive paints. I don’t foresee myself jumping into trying that any time soon, but I also don’t see why it wouldn’t work (as long as the paint doesn’t eat the foam on the roller.) Might be worth a try for someone who has a quart of automotive paint sitting around doing nothing. The Rustoleum is probably a lot cheaper than automotive paint, but I would hazard to guess that you’d use less by rolling it on vs. spraying.

After completing the job, if someone were to ask what is the secret to getting good results with this method, I’d have to list three things; prep, wet-sanding, and buffing. Skimp or screw up on any one of them and your final product will show it. (More on each of those topics at the end of this post.)

Make the jump to see a few photos of the car in process and as it stands today. You can’t really see the deficiencies in the paint, but if you saw it in person they’d be pretty apparent. It’s definitely about a “20 foot” paint job; looks great from a distance, but don’t look too closely. I’ve also added a checklist and step-by-step for the process with some hints from what I learned through the job. Hopefully someone can learn from some of my mistakes.
(more…)

What Are The Chances…

Saturday, August 1st, 2009

Had a weird one happen yesterday…

Caleb & I drove up to the Twin Cities to go to the Mall of America & goof around a bit. Actually, the Mall thing was more of a secondary excuse for going there, as I’d arranged to buy some needed BMW parts from a guy in St. Paul who was parting out a 528e. But we had a great time at the theme park inside the mall, so it was a great excuse to get us up there!

Anyway, when we finally got to the mall, found a parking spot and walked into the building, we bumped into my niece Kelsey and her mom, my brother’s ex-wife. Wow; what ARE the chances of that happening? For us to be walking in the fourth floor east parking ramp entrance at the same moment that they were walking out the same entrance… It kinda boggles the mind.

We didn’t exactly get to the mall directly… We drove up 35W, and I was looking for signs along the freeway that would tell me which exit to turn off to get to the mall, and didn’t see anything. When I finally decided we’d gone too far north, we were at the University of Minnesota (go Gophers!) Checking the map, I saw that where we were was directly north of the mall (way north, by about 15 miles!), so rather than taking 35W back south, we took the more circuitous route through the city, following Cedar Avenue, which connects directly with Minnesota 77, which passed right by the mall.

That took us to a side of the mall that I hadn’t been to on my previous few visits, and that put us in the east parking ramp, which I guess is a mirror image of the west ramp, which I was originally aiming for. We made a couple of sorties into parking areas only to be frustrated by finding no empty spots. Caleb suggested that we go to the top floor, and I suggested the one just below so we’d be in the shade, so we ended up near the fourth floor. Then we couldn’t find a couple of things in the van and had to hunt around a bit for them. Then we headed into the building for the surprise…

It makes me wonder how things like that come about, and why. All those delays put us in the right place at the right time for something wonderful to happen. I’m a firm believer that there is no such thing as a ‘coincidence’. Things happen because they are allowed to happen and we’re guided to appointments that God has arranged for us. We don’t always know what the purpose of those appointments is, nor should we be consumed by trying to interpret what they’re all about… I just have to sit, slack-jawed in awe of the Master of the Universe who can coordinate things so… beautifully.

That incident reminds me of something minor that happened years ago; I happened to look out the back window of our house on Norton at the very moment that a leaf fell from our neighbor’s Silver Maple tree. It was a solitary leaf falling after most of the others fell, and that leaf fell in such a manner, and the wind guided it just so that the hook of the stem caught on a branch of a smaller tree at the back of our yard. Like yesterday’s ‘coincidence’, that made me sit back in wonder at how intricately woven our lives are, and how awesome is the God who orchestrates this marvelous tapestry of our lives.

Wow.

BMWotD — 1986 Dinan M5

Tuesday, July 7th, 2009

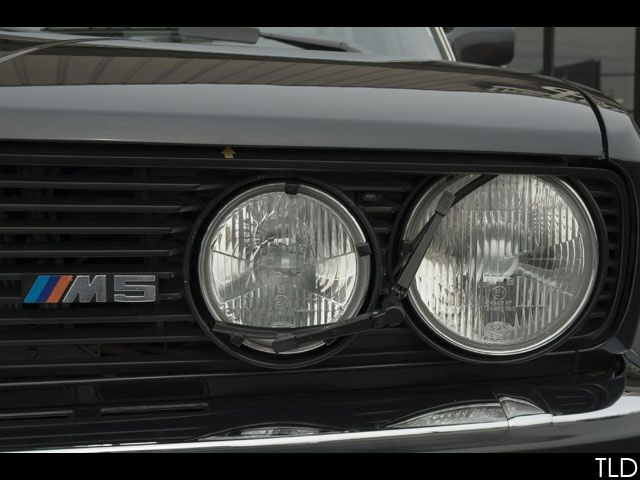
This car is awesome. Flat out awesome.

1986 BMW M5.

European specification model. Only 24,000 original miles!

This superb example features flawless “Diamond black” paint with gorgeous brown water buffalo leather. With only one owner from new, this Dinan-prepared M5 features an inter-cooled turbocharger and Borla stainless exhaust system, the combination of which produces an impressive 462 horsepower! A stage III suspension package and Brembo F-40 braking system with drilled rotors makes this a true “Ultimate Driving Machine” experience.

In addition, thermostatically controlled transmission and differential coolers have been fitted to the car.

The usual 5-series amenities of air conditioning, power windows, door locks and factory sunroof add to the comfort and convenience of this ultra-high performance sedan – a true sports car with four doors.

All EPA and DOT certification papers are available. Our M5 was imported by its one and only owner and all certification paperwork comes with the car. Even the original German ownership document is available! All upgrades were completed in California by Dinan, the preeminent company for BMW performance enhancements. The turbocharger brings the horsepower up to 462!

The differential has been converted to a 3:91 from the original 3:73. New clutch in 2005 and the turbo was rebuilt in 2006. Split Second control for air/fuel mixture has been installed in lieu of the air flow meter.

Surely this is among the finest, lowest mileage early M5’s anywhere and could certainly be unique with its upgrades. Lastly, the car has been thoroughly inspected and completely detailed by the TLD staff.

The first BMW M5, based on the E28 5 series, made its debut at the Amsterdam Motor Show in February 1985. It was born from the demand for an automobile with the carrying capacity of a sedan but the overall performance of a sports car. It utilized the 535i chassis and an evolution of the engine from the BMW M1. At the time of its launch, the E28 M5 was the fastest production sedan in the world. The European-specification examples featured 10.5:1 compression, a 0-60 time of 6.2 seconds and 286 horsepower. All M5’s were hand built. In addition, the E28 M5 remains the rarest of all regular production derived M cars. Only the purpose-built M1 has a lower production run.

This came up under the For Sale – Wanted forum at mye28.com, with a link to the seller’s eBay auction. It sounds like this isn’t the first time the car has been on eBay; previous attempts to sell it had the Buy-It-Now price even higher than today’s $31,900. Amazing that a 23 year-old car could be worth that much, even one with only 25,000 miles on it, prepped by Dinan, and kicking out 462 turbocharged intercooled horsepower. But I guess time will tell; like one of my college prof’s said, nothing is worth any more than someone is willing to pay for it.

I took the liberty of commandeering the photos from the eBay auction; feel free to flip through them after the jump. (more…)

A Cheapskate’s Paint Job, Part II

Tuesday, July 7th, 2009

Well, I’m a few days and five coats of paint into my Cheapskate’s Paint Job, and things are looking… OK. Not wonderful, but not terrible either; just OK.

In my last post about the paint job, I had two coats on it. Those runs & drips turned out to be something of an issue, and had I known how much of an issue, I would’ve dealt with them when the paint was still wet. After they dried though, they needed to be sanded down flat, and that took a fairly large area on the driver’s door right back down to the original paint. There were a few other spots in the same boat, but that was by far the largest area with that problem.

What I’ve learned is that the method to this madness is to put down a little bit of paint, trying to keep it as smooth and thin as possible, then after a couple of coats like that, use the wet-sanding to smooth out any imperfections and get rid of any little dust pimples. Things are infinitely easier on the horizontal surfaces when the paint is applied with the roller; whenever the brush is thrown into the mix, or when the roller is used on a vertical surface, look out. And when using the foam brush on a vertical surface… It’s really easy to hose things up, but good. That’s what my problem was on the driver’s door.

So I’m pressing forward with the project, and it’s looking better all the time. There are a couple of places on the hood and on the roof that make me cringe a bit; the old respray had cracked in places, and was fairly thick. Plus whoever did the respray had put some Bondo on some dents in the hood, which had cracked & allowed the metal below to rust a little, so I had to grind that down. But in those places where the cracking had occurred, I should’ve spent a little more time making things smooth before painting, because they’re still visible. Dang. I guess that’s one nice thing about this method of painting; if something looks bad enough that it needs attention later, there shouldn’t be much difficulty in getting the colors to match!

One thing I’ll need to do after I get things back together is spend a little time detailing and painting the door jambs and the inside of the doors. Right now, since I need to be opening and closing the doors during the repainting, I’m stopping at the edges of the door skins. I figure I’ll be able to get to those areas afterward by doing a door at a time; pull off the door seals, sand, paint & allow to dry, then put it back together. And for that, I should be able to use spray paint and/or full-strength paint to get it done in one shot. I won’t be so stressed about any imperfections there.

I was able to get paint into the channel around the hood and trunk lid, but the trunk seal is in the way for part of it, and that will need to be dealt with. The seal is held in place with adhesive, and probably needs to be replaced anyway, but I’m not ready to spend the $80 on that right now. I learned on the Nordstroms parts car that getting that seal off can easily lead to breakage; don’t need that. Later on, when I do replace the seal, I figure I can get it off, get the channel thoroughly cleaned out, and paint under there with full-strength paint. The hood channel along the fenders has several exposed bolt heads, and I don’t want to get a bunch of paint gooped up around them, so I’m painting that as I go now. It’s looking fairly well covered with four coats.

I’ve been busy enough with the paint and the holiday and other stuff that I haven’t even thought about the trim yet; all the stuff that is going back on is gonna look really tacky if I don’t do something with it. The black plastic pieces on the bumper and the mirrors are pretty badly faded, and the aluminum bumpers are a little scuffed. I’ll need to spend a little time cleaning them up and trying to restore some depth to the black plastic. Not sure if I’ll paint the plastic or see if there’s some kind of restorative goop that will help; I’m thinking the paint will be the fastest/cheapest option, but I also don’t want it to crack & run on me, so the jury is still out on that.

Another issue I’m having is with my mixed paint; I started out by mixing the paint & mineral spirits in a plastic container that I found in the house, and for the first few days it worked fine for storing the paint. But the last couple of times I’ve opened the container the paint has had a skin on its surface. I haven’t been successful in keeping the bits of skin out of the paint, and have had to pick several pieces off the car that I didn’t get off the roller. I think the the plastic is being affected by the paint and allowing some air to pass through, drying the paint on the surface. I should’ve stored the paint in the original can or a better container, but I didn’t want to spend the extra couple of bucks for that; lesson learned. I think I’ll stop by the store tonight & pick up a container, then use some cheesecloth to strain the chunks out of the paint. And mix another batch, which will be needed because I just remembered that I forgot to pour the paint from the tray back into the bucket! Dang!

Sorry; no photos yet, but I’ll get some tonight and put them up next time.

To read the rest of the story and see the final product in pictures, click here. Enjoy!

A Cheapskate’s Paint Job

Saturday, July 4th, 2009

To read the rest of the story and see the final product in pictures, click here and here. Enjoy!

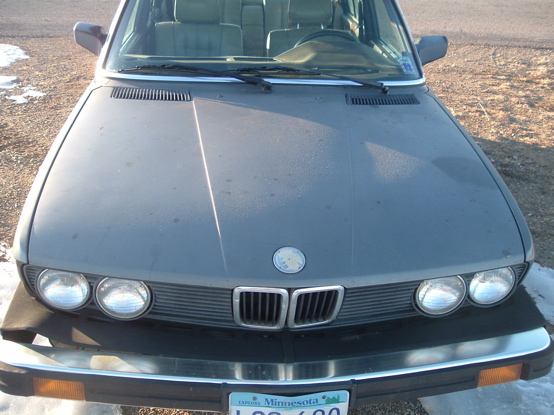
When I bought my BMW 528e in January, one of its more obvious deficiencies was the paint; one of the previous owners had had it resprayed for what must have been a good reason, but whoever did the work did an absolutely lousy job of prep work before the painting, and even the paint left a lot to be desired. The paint had not been given a clear coat, and a few years of neglect had taken its toll.

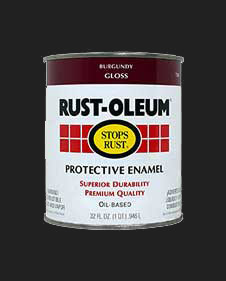
Having paid only $800 for the whole car, having it professionally painted didn’t seem to make a lot of sense, since a decent paint job would probably cost twice the purchase price. So an alternative was in order. I had picked up an issue of Hot Rod Paint & Body a while back that had an article in it describing how to Paint A Car With A Roller For Only $98 — they used multiple coats of Rustoleum paint thinned way down to the consistency of milk — and that seemed interesting.

Searching around on the Internet yielded what seemed to be the origin of that concept on a moparts.org thread that was started back in 2006. Someone was looking for a cheap affordable way to paint a car, and one of the users chimed in with this method. He said he had painted a number of cars this way before, and the photos of a ’69 Charger he linked to were pretty impressive.

I figure with the BMW, I don’t have much to lose; it needs paint, and I can either try this or pay an arm & a leg for a real paint job. If I try this and it doesn’t turn out, I can resort to plan B… So I dove into the project headlong last week. The next-door neighbor was going to be out of town for a few weeks, and I got permission from her to use her largely-unused large garage while she was away. I had originally planned to just work on mechanicals, but a brief discussion of the subject with Yvonne convinced me that I ought to go ahead with it. I picked up some Rustoleum Burgundy at Menards, along with some high-density foam rollers and a few other needed items, and set to work.

My decision to go with something other than the original color, and a non-BMW color at that, probably won’t earn me any brownie points with the mye28.com purists, but who cares. I chose that color because I like it, and because Bryce liked it, and it just may end up in his possession sometime soon (more on that later.)

As expected, much of the time in the last week was spent on prep work; stripping trim, bumpers & lights off of it, fixing the odd issues with the paint, and sanding it all down. Looked pretty scary after the sanding was done! But that was nothing compared to what it looked like after the first coat of paint. The author of the Hot Rod article (Christopher Campbell) wrote, “That first roll is by far the worst part, and the finish that greets you immediately afterward will likely make you want to reconsider the whole affair, but keep the faith!” Wow was he right; that first roll I laid down yesterday looked absolutely awful and gave me a pit in my stomach. I was so discouraged I didn’t even take any pictures of it.

So far, I’ve got two coats on it, and I have to say that with the second coat it’s looking better. There are runs in it, and lots of other imperfections that I probably haven’t yet seen, but all that will get fixed with sanding and additional coats. I hope. I probably should have sanded tonight, but it was raining all day, and the boys and I went to see a movie, and it was dark by the time we got back, and the lighting in the garage is less than wonderful, and… Ok, so I mostly didn’t feel like it. But I’ll do it first thing in the morning, let it dry a while, then put on the third coat. With any luck it’ll be dry by tomorrow night & ready for a fourth coat tomorrow evening. No photos yet, but I’ll take some in the days to come. Watch this space for updates!

Another BMW Update

Saturday, May 16th, 2009

It’s been over a month since I last posted about stuff I’ve done with the BMW, so it’s time for an update. Not that I’ve done a lot, but I have done some. A couple of Saturday’s ago I finally got around to installing a couple of the parts I’ve been gathering for the last while; a working instrument cluster and a turn signal switch that cancels on its own after turning a corner. My odometer is working(!), as is the service interval indicator. I even used a paper clip to cancel the service indication that’s apparently been on it since before the parts car at Ewe Pullet was junked, so now the only red light on my dash is the Brake Lining light, but that’s only there because of a broken wire on the rear wheel wear sensor. I’ll fix that when I next have the right-rear wheel off.

I ended up having to pull the cluster out a number of times since first replacing it because the junkyard cluster was a little flakey, but I’ve finally got that sorted out now, and everything now seems to be working as expected (knock on wood!) One of the circuit boards from the original cluster went into the junkyard cluster to get it to work right; the speedometer and temp/fuel gauges would quit working when the dash got hot (symptoms which were strikingly reminiscent of a certain white van we once owned.)

Replacing the turn signal required removing the steering wheel, which wasn’t too hard to do… once I got a couple of extra hands on the project. I had to buy a 22mm socket to fit the nut that holds the wheel in place, and had read that it’s a good idea (necessary, in fact) to disengage the steering wheel lock before attempting to loosen that nut. I tried cranking on the ratchet while holding the steering wheel, and just couldn’t get enough leverage. After about fifteen tries, I found an iron pipe to add a little leverage and enlisted the help of a strapping young teenager who happened to not be doing very much at the time; I held the steering wheel while Ian pushed on the extended wrench handle. One push was all it took. He wondered why I needed his help. (shakes head)

Another thing that cropped up recently was an issue with the left front brake; I noticed that the car didn’t come to a smooth stop the way it usually did, and wouldn’t roll easily if it was on a slight incline at a stoplight. After a short trip I got out and put my hand by each of the wheels to see if a brake was sticking, and sure enough the front left was hotter than a pistol. I drove around the following day trying to find a cylinder rebuild kit for it, and found that O’Reilly’s would sell me an entire rebuilt front caliper for $35, but they didn’t have them in stock and couldn’t get them for about a week. After a few more stops I found rebuild kits in stock at Sturdevants for $7.50. I grabbed two and tore into the project on a Friday afternoon.

Getting the caliper off was an easy process, but messy. Lots of gunk inside the cylinder, and a little bit of rust inside it. The seal boot was pretty well shot, which allowed moisture to get inside there, causing a little rust and pitting, which is what ultimately made it stick. That and the fact that the brake fluid was probably as old as the hills.

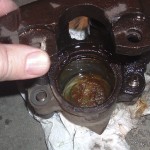
Putting the cylinder back together with the rebuild kit was not as easy as removing it. The piston with the rubber ring on it fit pretty snugly and I needed a clamp to get it back together. This was my first time messing with disk brakes, and I’ve got to say it wasn’t as bad as I expected. The toughest part was bleeding it, but it was only tough in that it took a lot of patience, and some help.

I also took another stab at rebuilding the shifter linkage, but again was turned back when I found I wasn’t able to get at all the parts, nor was I prepared to pull off the parts that would allow me to get at them.
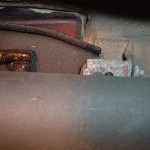
The photo on the left shows the driveshaft in the bottom half (looking up) and the rear shifter console mount on the right. The console is the stamped metal bit that angles away from the mount; the console is held in place at the front by two brackets/bolts on the back of the transmission, and the little rubber stopper/thingy at the back. The two brackets & bolts are obscured by the flexible coupling (the guibo) and harmonic balancer shown in the photo on the right. You can barely see the shift linkage rod there, and I knew there was no way I could get at it without seeing it. So the driveshaft needs to get out of the way.

I also need to replace the guibo (notice the cracks in the rubber in the photo), so I took a Friday off a couple of weeks ago to take a run at it. Got the front end of the car up in the air on a set of ramps, and found that even with the bolts in the guibo removed, there is still a part of the driveshaft — the centering sleeve — that extends into the transmission output shaft, and the driveshaft doesn’t move back far enough to allow that to come out. So the center bearing needs to be unbolted from the bottom of the car so the shaft can bend enough to pull the centering sleeve out of the output shaft. But… The catalytic converter is in the way, making it next to impossible to get at the bolts holding the center bearing in place.

I was hoping I could do it without pulling the cat off, but it looked like the job wasn’t going to be possible without it. But getting the cat off is easier said than done; there are two pipes running from the exhaust manifolds to the cat, and six copper nuts holding them in place. Those nuts are difficult to reach, and having been in place for 25 years or so, they’re not coming off without a fight. I didn’t have the time, the tools, nor the patience to work at them any longer, so I buttoned it all up to try again another day. I later found out that the best way is to use plenty of PB Blaster to loosen the nuts, and a long socket extension to get at them from under the car. Now I’m waiting for a convenient time to go at it again, but getting under the thing is such an unpleasant task that I keep putting it off. If only I had an EZCarLift in the garage… Getting more than 15 inches under the thing would be so very nice.

One last thing to mention is with the heat… I’ve noticed that the heat is a little difficult to control. The controls in the e28 work differently than any car I’ve had before, and it seemed like there was always an abundance of cabin heat available. That wasn’t an issue in the winter, but now that it’s getting warmer, it’s an issue. The amount of coolant flowing to the heater core is controlled by a solenoid valve and temperature sensor, located under the dash near the clutch pedal. I started by checking the vacuum hose to the temp sensor, and found it to be disconnected, and when I checked the rest of the hose leading to the intake manifold it seemed that it was plugged, so I replaced the hose and made sure everything was connected. Still too much heat.

Next to check was the heater control valve; they are known to be a problem, and I was betting it was stuck open. But try as I might, I couldn’t find it. It’s supposed to be located on the firewall near the brake system master cylinder, but all I saw was hoses. Turns out that the valve had been a problem in the past, and the previous owner had just taken it out & replaced it with a couple of plastic elbows and four inches of hose. No wonder I couldn’t find it. So now I need to either track down a replacement OE valve, or rig something up in its place. I thought it’d be possible to just put a clamp on the hose, but that proved to be harder than I thought, so I’m back to plan ‘A’.

I cleaned things up a little in the trunk a while back. The trunk was clean to start with, but there was what appeared to be a sound dampening pad covering the floor of the trunk. That had turned hard & brittle, and was crumbling in many places, so I took a putty knife to it & removed it. Thankfully there was no rust anywhere in the trunk, so I put a little elbow grease into cleaning it out well, cleaning up the mats and trunk wall inserts, then took some black spray paint to the sheet metal. The paint was applied several weeks ago, and I still smell paint from the trunk every time I drive with the windows down. I can also smell gasoline from the trunk, which means I should replace the one last hose attached to the fuel evaporator tank; if that doesn’t take care of the smell, pulling the fuel tank is the next step to solving that issue. Here’s hoping!

I haven’t done much else with the car, other than buy a few things here & there for it; I still have the passenger & rear seats to replace. I also picked up a moonroof out of a Saab 9000, which is a direct replacement for the sunroof panel in the e28; that’s waiting to be installed. The main hurdle before doing that is figuring out what to use for a cover on the shade panel; it’d be best to have something similar to the headliner, but… where to source that is a mystery to me. I might just end up painting it a similar color, or maybe black.

I also ordered and received a Bentley 5-series Service Manual and a valve cover gasket, as the valves need to be adjusted on it. With the help of the Bentley I’ll take a run at that one of these first warm evenings. I’ve heard that it takes a good three hours or so; I’d better budget twice that for the job. And I still need to order a timing belt, idler, and water pump; I have no idea how long it’s been since that belt has been changed, so it could be a ticking time bomb waiting to destroy my valve head and/or pistons. Don’t want that to happen. I was hoping to buy the valve head off of the 528 that was in the Ewe Pullet yard, to put some work into porting/polishing it, then replace the belt & the whole works… But then Nordstroms decided the 528 had been there long enough and it’s gone. Crap. The thing that really ticked me off was checking on a Sunday to make sure it was still there then going out to pull a few things on Tuesday to find it was gone. Had a little shouting match with the guy behind the counter over that, and managed to make a fool of myself.

Wow; that was quite an update. I guess I should do this more often!