This is the third and maybe final installment in my Cheapskate’s Paint Job series (click here for Part 1, and here for Part 2.) One thing is for sure; the “$50 Paint Job” is a bit of a misnomer; it’s a paint job alright, but I’m pretty sure I passed the $50 mark not too long after buying the paint for it. I didn’t keep very close track of things, but when it was all said & done, the paint & materials for the job cost somewhere in the neighborhood of $200. Still far cheaper than a professional paint job, but $50 just wouldn’t cut it! So I’ll just call it The Cheapskate’s Paint Job®!
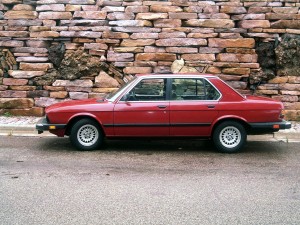
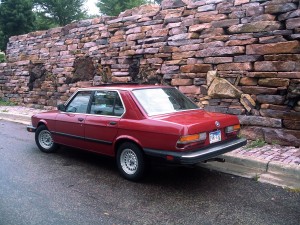
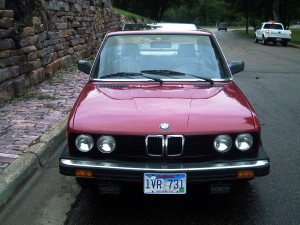
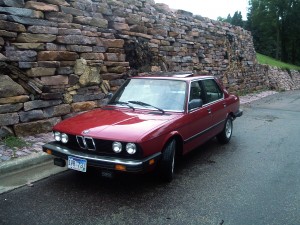
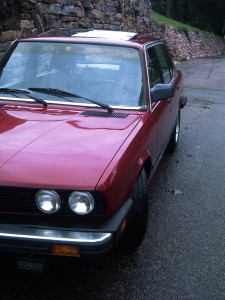
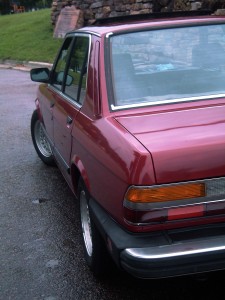
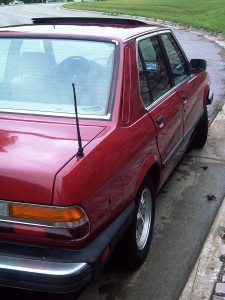
The car is nearly complete — only a few niggling details to button up — and I have to say I’m impressed with the results. I am by no means an autobody guy, but I do know a decent paint job when I see one, and this one shines like a professionally painted car. And that’s with no clearcoat and no wax on it. There are little issues galore with the paint job, most of them related to my crappy prep job (which is directly related to my crappy/nonexistent autobody skills), and my inexperience with the entire process, and my rush to finish it up in the last week or so.
But the final product proves to me at least that the concept and process is sound, and can yield a nice looking paint job for someone on a tight budget but has a good measure of patience and some spare time. Another thing I like about this process is that repairing scratches or dings or dents should be much less painful. One of the things that happened to me is that the mystery of auto finishing is gone; it’s no longer a black art in my mind. If something goes wrong with it, I know what went into getting it to look the way it does, and repairing it won’t be as monumental a task in my mind.
I can also say that the next time I take on a job like this, it’ll be killer. Will I take on another job like this? Mmmmm… Not in the foreseeable future, but if the need presents itself, and I don’t want to spend thousands of dollars on the car… And I have a better situation for garage space… And I have nothing better to do with a few weeks of my spare time… I might consider it. But not any time soon unless I want to be minus a wife!
The time involved was the biggest issue for me, but thankfully I had a spare car sitting in front of the house that I could use while the 528 was off the street. I don’t remember exactly what day I started this job, but I know it was around the beginning of July — about six weeks ago. It didn’t exactly take that long to complete, because there was a lot of downtime/thinking time/research time thrown in there, noodling out how to accomplish whatever the next step was. It’s definitely not a project to take on when you don’t have alternative transportation of some sort. If I were to do it again, I think I could be done — start to finish — in about a week. If I didn’t get sidetracked or distracted. As if that would ever happen.
The Rustoleum paint turned out pretty well, but one thing that might be an obstacle for some people is the limited number of colors, and the fact that there are no metallic colors; just solid colors. While I was painting I wondered whether this method would maybe work with standard automotive paints. I don’t foresee myself jumping into trying that any time soon, but I also don’t see why it wouldn’t work (as long as the paint doesn’t eat the foam on the roller.) Might be worth a try for someone who has a quart of automotive paint sitting around doing nothing. The Rustoleum is probably a lot cheaper than automotive paint, but I would hazard to guess that you’d use less by rolling it on vs. spraying.
After completing the job, if someone were to ask what is the secret to getting good results with this method, I’d have to list three things; prep, wet-sanding, and buffing. Skimp or screw up on any one of them and your final product will show it. (More on each of those topics at the end of this post.)
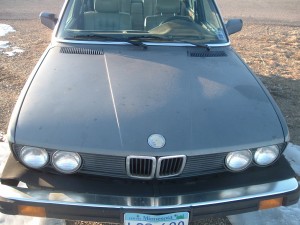
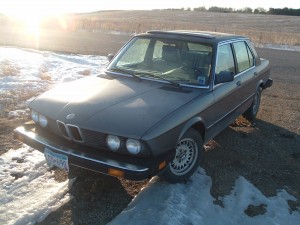
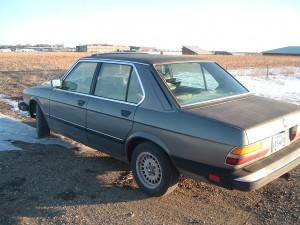
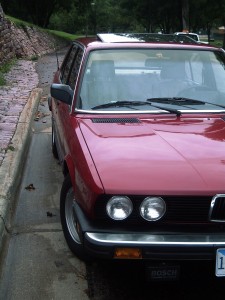
Make the jump to see a few photos of the car in process and as it stands today. You can’t really see the deficiencies in the paint, but if you saw it in person they’d be pretty apparent. It’s definitely about a “20 foot” paint job; looks great from a distance, but don’t look too closely. I’ve also added a checklist and step-by-step for the process with some hints from what I learned through the job. Hopefully someone can learn from some of my mistakes.
Materials List:
-
- Rustoleum (or Tremclad in Canada) in the can, not spray.
- Two 1-quart cans should be more than plenty for most cars; smaller cars might be able to be done with one can.
- It might be a good idea to buy a matching can or two of the spray Rustoleum for the extremely hard-to-get-to places.
- When you buy the paint, don’t have it shaken at the paint store; enamel should be stirred, not shaken, otherwise you’ll have bubbles in the paint for a week!
- Several 4″ professional foam rollers.
- They are a very high density foam, typically about 1.5″ around, have rounded ends, and usually white.
- Several foam brushes
- Get the cheap ones, of several different sizes, and multiples of whatever sizes you need.
- Several tack cloths
- Just the run-o-the-mill tack cloth is all you need to get the stray dust particles off the car before painting.
- 1 gallon of mineral spirits
- to thin the paint, and for cleanup jobs
- Sandpaper
- One or two sheets each of 80, 100, 200, 400, 600, 800 & 1000-1500 grit paper
- A roll of good quality automotive masking tape
- Get something that will peel off easily after being in place for some time; cheap tapes will gain a tighter grip the longer they’re left in place, and you’ll likely have this stuff on for a week or more.
- Working around items that have been masked off is a pain in the @55. Any trim that’s not welded in place and will come off without breaking it really ought to be removed; it makes painting and post-painting cleanup much easier.
- A spare paint can or resealable bucket for mixing your paint.
- Rustoleum (or Tremclad in Canada) in the can, not spray.
A drop cloth or large plastic sheet for covering your garage floor.
-
- You can buy light-gauge plastic sheeting that will more than cover an entire garage stall for about $3.00.
- Whether your floor is bare concrete or sealed or coated or painted, it’s a good idea to cover it with a tarp, drop cloth or sheet of plastic to keep paint drips from staining the concrete when painting and wetsanding. The thinned-down paint will drip, guaranteed, and the water dripping from the car when you’re wetsanding will stain bare concrete! You have been warned!
- Turtle Wax Polishing Compound
- Don’t use rubbing compound, as it’s too harsh.
- A variable-speed buffer with a foam buffing pad
- Don’t waste your time with the department store random-orbital waxer polishers that can be had for around $40 or less; they don’t drive the buffing pad directly, and don’t generate the buffing action needed to polish the car.
- Good quality buffers are usually available from rental shops for about $20 a day.
- Foam buffing pads can be purchased for about $10 at auto parts stores. You may be able to get the job done with cloth pads, but I can attest to the fact that the foam pad works, and does a good job.
- You only need the buffer for when you’re finished painting, and you can usually count on needing it for a day or less.
- Alternative: If you know someone who is in the autobody business, has a buffer, knows how to use it, and is willing to do the buffing for you in exchange for cash or pizza or adult beverages, I’d suggest going that route. Getting good results with a buffer takes some time and practice, and if you don’t know what you’re doing you’re liable to muck things up pretty good (like I did!) which takes extra time and effort to straighten out. Make sure the adult beverages are consumed after the job is done.
-
- Before you start painting:
- Prep your car as if it was any other paint job;
- pull off any trim that’s in the way,
- fix any dings or dents,
- sand & fill any chips,
- fix all the rust, etc….
- Sand down the car with 80-grit sandpaper, then 100-grit, then 200-grit, and finish with 400-grit.
- If there’s a lot of rust or dent repairing to be done, decide now whether it’s worth the work. Don’t be surprised if this step takes longer than the actual painting. And if you decide to skimp on this step (like I did!) be prepared to live with the results.
- Next, tape off any trim that’s still on the car immediately adjacent to the areas you’re painting.
- Before you start painting:
While it’s not necessary to tape off entire windows or the wheels — you’ve got much more control in where the paint goes than with spray — it’s still not a bad idea to do so. There’s no overspray, but you do get drips from wetsanding and splatter from buffing that will need to be cleaned off any areas that aren’t masked.
Any areas that are masked only need an inch or so of tape beyond the areas to be painted.
Rustoleum contains elements which allow it to be painted over bare metal, so there is no need to prime the car. One less step in the process!
Clean out the garage thoroughly to minimize dust that could get kicked up.
After you’ve cleaned, allow some time for the dust you’ve kicked up to settle, like overnight. Then wetmop the floor using an old towel wrapped around a broom and a bucket of soapy water. That will help to keep any remaining dust from getting kicked up.
After it’s dried, lay down your drop cloth.
Lighting. Lighting, lighting, lighting.
Make sure you’ve got decent light in your work area so that you can see any problems developing before they become unmanageable. With the thin paint, it’s sometimes hard to see a drip line; it’s much easier to deal with that drip line if you can catch it while the paint is still wet. Once it’s dry, it has to be sanded down, which is time-consuming, plus the sanding will likely take at least that coat of paint away, and you’ll need to repaint that area. Or, if you can live with the drip line…
Once you’ve taken care of all that, you’re ready to roll on some paint.
Thin the paint down; pour about 1/4 of a quart can of Rustoleum into your spare can/container & add enough mineral spirits to thin it down to about the consistency of milk; just a little thicker than water. Too thin and it will run terribly on vertical surfaces. And don’t mix up too much ahead of time; even if you seal the can up tight, the paint will still form a skin over the top if left for a half-day or so, and you’ll have a tough time getting it out of the can without little bits ending up in the paint can and on your roller and on your car.
It’s best to do one body section at a time and have a set progression so that you don’t miss anything. I usually started with the hood and worked towards the back… front-left fender, left side of the roof, driver’s door, left rear door, left-rear quarter, then went to the front right side & followed the same rearward progression, ending up with the trunklid.
I also found it worked better to have both the roller and brush in hand while working rather than going over it with the roller then going back to catch the tighter areas with the brush; too often I’d miss some spots, or the wet brush on the half-dried paint would muck up the slightly-dry paint nearby.
Avoid getting the roller completely saturated with paint; too much paint on the roller creates problems with application, especially on vertical surfaces. If you get too much paint on a vertical surface, it’s going to run, then you’ll spend extra time chasing the runs before they dry out, or worse yet, sanding them out after they’ve dried.
When applying the paint, if you do see runs or bumps or other imperfections in the wet paint, go over the area again with a slightly dry roller (not immediately after dipping it in the paint) while those imperfections are still wet. The paint is still workable as long as it’s wet, and it’s far easier to deal with those issues when it’s wet.
If you don’t like the way something is looking, wipe off the wet paint with a rag soaked in mineral spirits. Let the area dry, then try again. Much easier to get the wet paint off than the dry.
The thin consistency of the paint allows it to self-level to a degree. If it looks a little orange-peel after you roll it out, wait a little bit & you’ll see it level out.
-
- Once you get the whole car coated, let it dry for at least 6 to 8 hours before the next coat is applied or before you wet sand.
The key to getting good results is to lay down a thin layer of paint — 2 coats is usually good — then wet sand the whole car, then 2 more coats, wetsand, 2 coats, wetsand, etc… until done. The wetsanding not only provides something for the next coat to grip onto, but it also removes any little goobers that landed in the wet paint.
Do not block sand the car, just wetsand by HAND.
When sanding, keep the surface really wet using a spray bottle filled with water. Keep a clean bucket of water and a cheap chamois close by to clean it off to see how it looks. Don’t be afraid to go over an area twice, especially with the finer paper, as it won’t remove the goobers in the paint quite as quickly as the rougher paper.
It’s best to use progressively finer sandpaper; after 2 coats, wet-sand with a 600-grit paper. After 4 coats, wetsand with 800-grit. After 6 coats, 1000-1500-grit. I ended up with 8 or 9 coats, then used some nice 2000-grit paper from Meguire’s.
- When you’re satisfied that the paint is covered well and it’s ready to go, polish it up using the polishing compound & a buffer.
- When buffing, use an applicator pad to smear the polishing compound around on the area you want to buff. I went with just a section at a time, using the creases in the body as the borders for the area to work on; left third of hood, middle of hood, right third of hood, top of fender, top of door, etc…
- Run the buffer at about 2000 RPM. If the compound dries out on the surface, spritz a little water on it; the buffing pad needs a little moisture in order to work well.
- When I was buffing it out, sometimes the buffer pad would just absorb all the moisture & polishing compound, and I’d see a nice shiny surface appear behind the buffer, but other times I’d have to use a wet chamois cloth to clear it off & see the shine; not sure what the recommended procedure, but either way worked.
- Some areas needed two buffings to bring out a decent shine. I guess there would come a point where you buff right through the paint, but I’d say buff until you’re happy with the shine you get.
- I haven’t waxed the car yet; the fresh paint with the residual polish seems to repel water just fine, so I’m going to leave it now. I would guess that adding a coat of wax can only help it to shine. From what I’ve read about this paint method, the paint cures quickly between coats, so you don’t have to wait to wax it like you would following a spray. Wax on!
- As for the three most important things to a decent rolled paint job…
- Prep — Anything below the surface of the paint that isn’t smooth and ripple-free is going to show. If you’ve got dents, straighten and/or fill them. If you have to fill, use good quality bondo, make sure there’s no rust underneath and the surface below is prepped properly to help the bondo bond. If you’ve got chipped paint, fill it & make sure it’s as smooth as you want it to be. I skimped on this step — didn’t think some of the chips & dents & miscellaneous imperfections would matter, but they show now. I’m probably the only one who will care, but they bug me now & I wish I’d spent more time on that.
- Wet-Sanding — Don’t rush the wet-sanding, and inspect an area carefully when you sand it. It’s easy for a speck of dust or lint or whatever to get embedded in the paint; wet-sanding will get rid of it before more paint gets rolled on top of it. The wet-sanding can also give you a smoother finish with no orange-peel look.
- Buffing — Buffing the paint out after your final coat is critical to getting things to look good. I messed around a lot on this step, wasting a lot of time and blowing some money on stuff that didn’t help a bit. Like the random-orbit waxer/polisher I got. $39, and it doesn’t do diddly with the polishing compound. I bought a buffing pad that fits on a drill and that worked ok, but it takes a lot of torque to spin the thing & do a thorough job; I was afraid the drill would melt before I got the hood done! I wish I’d taken the advice of the guy on that Mopar board & got an old hood or something to practice on (or better yet, bought a replacement hood for my car and practiced on the original, dented & rusted one.)
Hope someone finds this to be helpful. If you do, register and leave a comment! Thanks!
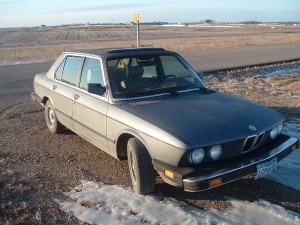
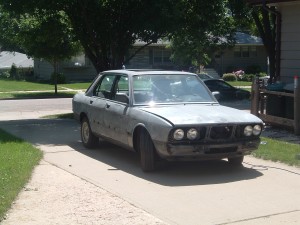
Before
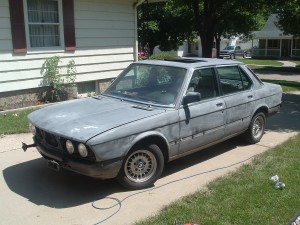
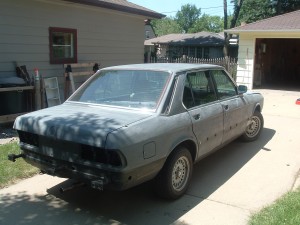
Prep
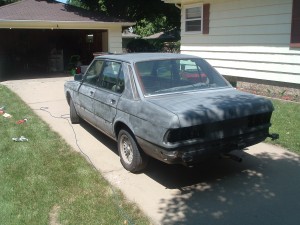
Getting There…
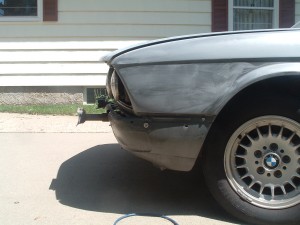
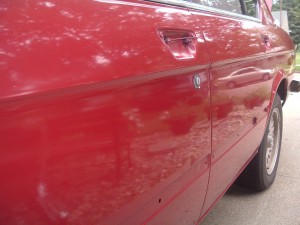
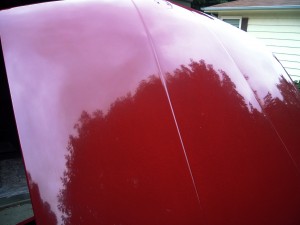
After
Tags: $50 paint job, bmw, burgundy, cheapskate, pch, roller, rustoleum
[…] the original post: A Cheapskate’s Paint Job — The Final Product Filed under: Uncategorized Tags: a-few-niggling, a-paint-job, article, auto car, far-cheaper, […]
Dude!! I love this!! I want to see it in-person. Bring it to church on Sunday. (Or, better yet, let’s finally set a date for lunch…)
[…] friend Dave drives a BMW. He even bought a second one. Now that’s […]