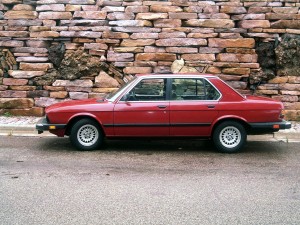
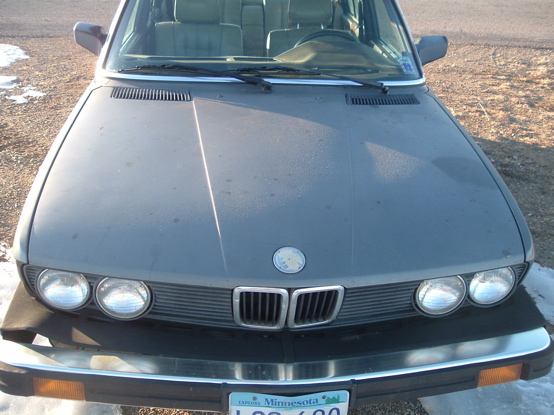
It’s been over a month since I last posted about stuff I’ve done with the BMW, so it’s time for an update. Not that I’ve done a lot, but I have done some. A couple of Saturday’s ago I finally got around to installing a couple of the parts I’ve been gathering for the last while; a working instrument cluster and a turn signal switch that cancels on its own after turning a corner. My odometer is working(!), as is the service interval indicator. I even used a paper clip to cancel the service indication that’s apparently been on it since before the parts car at Ewe Pullet was junked, so now the only red light on my dash is the Brake Lining light, but that’s only there because of a broken wire on the rear wheel wear sensor. I’ll fix that when I next have the right-rear wheel off.
I ended up having to pull the cluster out a number of times since first replacing it because the junkyard cluster was a little flakey, but I’ve finally got that sorted out now, and everything now seems to be working as expected (knock on wood!) One of the circuit boards from the original cluster went into the junkyard cluster to get it to work right; the speedometer and temp/fuel gauges would quit working when the dash got hot (symptoms which were strikingly reminiscent of a certain white van we once owned.)
Replacing the turn signal required removing the steering wheel, which wasn’t too hard to do… once I got a couple of extra hands on the project. I had to buy a 22mm socket to fit the nut that holds the wheel in place, and had read that it’s a good idea (necessary, in fact) to disengage the steering wheel lock before attempting to loosen that nut. I tried cranking on the ratchet while holding the steering wheel, and just couldn’t get enough leverage. After about fifteen tries, I found an iron pipe to add a little leverage and enlisted the help of a strapping young teenager who happened to not be doing very much at the time; I held the steering wheel while Ian pushed on the extended wrench handle. One push was all it took. He wondered why I needed his help. (shakes head)
Another thing that cropped up recently was an issue with the left front brake; I noticed that the car didn’t come to a smooth stop the way it usually did, and wouldn’t roll easily if it was on a slight incline at a stoplight. After a short trip I got out and put my hand by each of the wheels to see if a brake was sticking, and sure enough the front left was hotter than a pistol. I drove around the following day trying to find a cylinder rebuild kit for it, and found that O’Reilly’s would sell me an entire rebuilt front caliper for $35, but they didn’t have them in stock and couldn’t get them for about a week. After a few more stops I found rebuild kits in stock at Sturdevants for $7.50. I grabbed two and tore into the project on a Friday afternoon.
Getting the caliper off was an easy process, but messy. Lots of gunk inside the cylinder, and a little bit of rust inside it. The seal boot was pretty well shot, which allowed moisture to get inside there, causing a little rust and pitting, which is what ultimately made it stick. That and the fact that the brake fluid was probably as old as the hills.

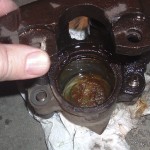
Putting the cylinder back together with the rebuild kit was not as easy as removing it. The piston with the rubber ring on it fit pretty snugly and I needed a clamp to get it back together. This was my first time messing with disk brakes, and I’ve got to say it wasn’t as bad as I expected. The toughest part was bleeding it, but it was only tough in that it took a lot of patience, and some help.
I also took another stab at rebuilding the shifter linkage, but again was turned back when I found I wasn’t able to get at all the parts, nor was I prepared to pull off the parts that would allow me to get at them.
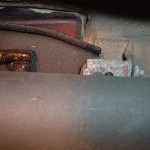

The photo on the left shows the driveshaft in the bottom half (looking up) and the rear shifter console mount on the right. The console is the stamped metal bit that angles away from the mount; the console is held in place at the front by two brackets/bolts on the back of the transmission, and the little rubber stopper/thingy at the back. The two brackets & bolts are obscured by the flexible coupling (the guibo) and harmonic balancer shown in the photo on the right. You can barely see the shift linkage rod there, and I knew there was no way I could get at it without seeing it. So the driveshaft needs to get out of the way.
I also need to replace the guibo (notice the cracks in the rubber in the photo), so I took a Friday off a couple of weeks ago to take a run at it. Got the front end of the car up in the air on a set of ramps, and found that even with the bolts in the guibo removed, there is still a part of the driveshaft — the centering sleeve — that extends into the transmission output shaft, and the driveshaft doesn’t move back far enough to allow that to come out. So the center bearing needs to be unbolted from the bottom of the car so the shaft can bend enough to pull the centering sleeve out of the output shaft. But… The catalytic converter is in the way, making it next to impossible to get at the bolts holding the center bearing in place.
I was hoping I could do it without pulling the cat off, but it looked like the job wasn’t going to be possible without it. But getting the cat off is easier said than done; there are two pipes running from the exhaust manifolds to the cat, and six copper nuts holding them in place. Those nuts are difficult to reach, and having been in place for 25 years or so, they’re not coming off without a fight. I didn’t have the time, the tools, nor the patience to work at them any longer, so I buttoned it all up to try again another day. I later found out that the best way is to use plenty of PB Blaster to loosen the nuts, and a long socket extension to get at them from under the car. Now I’m waiting for a convenient time to go at it again, but getting under the thing is such an unpleasant task that I keep putting it off. If only I had an EZCarLift in the garage… Getting more than 15 inches under the thing would be so very nice.
One last thing to mention is with the heat… I’ve noticed that the heat is a little difficult to control. The controls in the e28 work differently than any car I’ve had before, and it seemed like there was always an abundance of cabin heat available. That wasn’t an issue in the winter, but now that it’s getting warmer, it’s an issue. The amount of coolant flowing to the heater core is controlled by a solenoid valve and temperature sensor, located under the dash near the clutch pedal. I started by checking the vacuum hose to the temp sensor, and found it to be disconnected, and when I checked the rest of the hose leading to the intake manifold it seemed that it was plugged, so I replaced the hose and made sure everything was connected. Still too much heat.
Next to check was the heater control valve; they are known to be a problem, and I was betting it was stuck open. But try as I might, I couldn’t find it. It’s supposed to be located on the firewall near the brake system master cylinder, but all I saw was hoses. Turns out that the valve had been a problem in the past, and the previous owner had just taken it out & replaced it with a couple of plastic elbows and four inches of hose. No wonder I couldn’t find it. So now I need to either track down a replacement OE valve, or rig something up in its place. I thought it’d be possible to just put a clamp on the hose, but that proved to be harder than I thought, so I’m back to plan ‘A’.
I cleaned things up a little in the trunk a while back. The trunk was clean to start with, but there was what appeared to be a sound dampening pad covering the floor of the trunk. That had turned hard & brittle, and was crumbling in many places, so I took a putty knife to it & removed it. Thankfully there was no rust anywhere in the trunk, so I put a little elbow grease into cleaning it out well, cleaning up the mats and trunk wall inserts, then took some black spray paint to the sheet metal. The paint was applied several weeks ago, and I still smell paint from the trunk every time I drive with the windows down. I can also smell gasoline from the trunk, which means I should replace the one last hose attached to the fuel evaporator tank; if that doesn’t take care of the smell, pulling the fuel tank is the next step to solving that issue. Here’s hoping!
I haven’t done much else with the car, other than buy a few things here & there for it; I still have the passenger & rear seats to replace. I also picked up a moonroof out of a Saab 9000, which is a direct replacement for the sunroof panel in the e28; that’s waiting to be installed. The main hurdle before doing that is figuring out what to use for a cover on the shade panel; it’d be best to have something similar to the headliner, but… where to source that is a mystery to me. I might just end up painting it a similar color, or maybe black.
I also ordered and received a Bentley 5-series Service Manual and a valve cover gasket, as the valves need to be adjusted on it. With the help of the Bentley I’ll take a run at that one of these first warm evenings. I’ve heard that it takes a good three hours or so; I’d better budget twice that for the job. And I still need to order a timing belt, idler, and water pump; I have no idea how long it’s been since that belt has been changed, so it could be a ticking time bomb waiting to destroy my valve head and/or pistons. Don’t want that to happen. I was hoping to buy the valve head off of the 528 that was in the Ewe Pullet yard, to put some work into porting/polishing it, then replace the belt & the whole works… But then Nordstroms decided the 528 had been there long enough and it’s gone. Crap. The thing that really ticked me off was checking on a Sunday to make sure it was still there then going out to pull a few things on Tuesday to find it was gone. Had a little shouting match with the guy behind the counter over that, and managed to make a fool of myself.
Wow; that was quite an update. I guess I should do this more often!


