Posts Tagged ‘$50 paint job’

A Cheapskate’s Paint Job — The Final Product

Thursday, August 20th, 2009

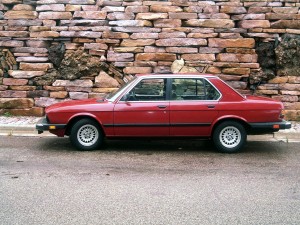
This is the third and maybe final installment in my Cheapskate’s Paint Job series (click here for Part 1, and here for Part 2.) One thing is for sure; the “$50 Paint Job” is a bit of a misnomer; it’s a paint job alright, but I’m pretty sure I passed the $50 mark not too long after buying the paint for it. I didn’t keep very close track of things, but when it was all said & done, the paint & materials for the job cost somewhere in the neighborhood of $200. Still far cheaper than a professional paint job, but $50 just wouldn’t cut it! So I’ll just call it The Cheapskate’s Paint Job®!


The car is nearly complete — only a few niggling details to button up — and I have to say I’m impressed with the results. I am by no means an autobody guy, but I do know a decent paint job when I see one, and this one shines like a professionally painted car. And that’s with no clearcoat and no wax on it. There are little issues galore with the paint job, most of them related to my crappy prep job (which is directly related to my crappy/nonexistent autobody skills), and my inexperience with the entire process, and my rush to finish it up in the last week or so.

But the final product proves to me at least that the concept and process is sound, and can yield a nice looking paint job for someone on a tight budget but has a good measure of patience and some spare time. Another thing I like about this process is that repairing scratches or dings or dents should be much less painful. One of the things that happened to me is that the mystery of auto finishing is gone; it’s no longer a black art in my mind. If something goes wrong with it, I know what went into getting it to look the way it does, and repairing it won’t be as monumental a task in my mind.

I can also say that the next time I take on a job like this, it’ll be killer. Will I take on another job like this? Mmmmm… Not in the foreseeable future, but if the need presents itself, and I don’t want to spend thousands of dollars on the car… And I have a better situation for garage space… And I have nothing better to do with a few weeks of my spare time… I might consider it. But not any time soon unless I want to be minus a wife!

The time involved was the biggest issue for me, but thankfully I had a spare car sitting in front of the house that I could use while the 528 was off the street. I don’t remember exactly what day I started this job, but I know it was around the beginning of July — about six weeks ago. It didn’t exactly take that long to complete, because there was a lot of downtime/thinking time/research time thrown in there, noodling out how to accomplish whatever the next step was. It’s definitely not a project to take on when you don’t have alternative transportation of some sort. If I were to do it again, I think I could be done — start to finish — in about a week. If I didn’t get sidetracked or distracted. As if that would ever happen.

The Rustoleum paint turned out pretty well, but one thing that might be an obstacle for some people is the limited number of colors, and the fact that there are no metallic colors; just solid colors. While I was painting I wondered whether this method would maybe work with standard automotive paints. I don’t foresee myself jumping into trying that any time soon, but I also don’t see why it wouldn’t work (as long as the paint doesn’t eat the foam on the roller.) Might be worth a try for someone who has a quart of automotive paint sitting around doing nothing. The Rustoleum is probably a lot cheaper than automotive paint, but I would hazard to guess that you’d use less by rolling it on vs. spraying.

After completing the job, if someone were to ask what is the secret to getting good results with this method, I’d have to list three things; prep, wet-sanding, and buffing. Skimp or screw up on any one of them and your final product will show it. (More on each of those topics at the end of this post.)

Make the jump to see a few photos of the car in process and as it stands today. You can’t really see the deficiencies in the paint, but if you saw it in person they’d be pretty apparent. It’s definitely about a “20 foot” paint job; looks great from a distance, but don’t look too closely. I’ve also added a checklist and step-by-step for the process with some hints from what I learned through the job. Hopefully someone can learn from some of my mistakes.
(more…)
A Cheapskate’s Paint Job, Part II

Tuesday, July 7th, 2009

Well, I’m a few days and five coats of paint into my Cheapskate’s Paint Job, and things are looking… OK. Not wonderful, but not terrible either; just OK.

In my last post about the paint job, I had two coats on it. Those runs & drips turned out to be something of an issue, and had I known how much of an issue, I would’ve dealt with them when the paint was still wet. After they dried though, they needed to be sanded down flat, and that took a fairly large area on the driver’s door right back down to the original paint. There were a few other spots in the same boat, but that was by far the largest area with that problem.

What I’ve learned is that the method to this madness is to put down a little bit of paint, trying to keep it as smooth and thin as possible, then after a couple of coats like that, use the wet-sanding to smooth out any imperfections and get rid of any little dust pimples. Things are infinitely easier on the horizontal surfaces when the paint is applied with the roller; whenever the brush is thrown into the mix, or when the roller is used on a vertical surface, look out. And when using the foam brush on a vertical surface… It’s really easy to hose things up, but good. That’s what my problem was on the driver’s door.

So I’m pressing forward with the project, and it’s looking better all the time. There are a couple of places on the hood and on the roof that make me cringe a bit; the old respray had cracked in places, and was fairly thick. Plus whoever did the respray had put some Bondo on some dents in the hood, which had cracked & allowed the metal below to rust a little, so I had to grind that down. But in those places where the cracking had occurred, I should’ve spent a little more time making things smooth before painting, because they’re still visible. Dang. I guess that’s one nice thing about this method of painting; if something looks bad enough that it needs attention later, there shouldn’t be much difficulty in getting the colors to match!

One thing I’ll need to do after I get things back together is spend a little time detailing and painting the door jambs and the inside of the doors. Right now, since I need to be opening and closing the doors during the repainting, I’m stopping at the edges of the door skins. I figure I’ll be able to get to those areas afterward by doing a door at a time; pull off the door seals, sand, paint & allow to dry, then put it back together. And for that, I should be able to use spray paint and/or full-strength paint to get it done in one shot. I won’t be so stressed about any imperfections there.

I was able to get paint into the channel around the hood and trunk lid, but the trunk seal is in the way for part of it, and that will need to be dealt with. The seal is held in place with adhesive, and probably needs to be replaced anyway, but I’m not ready to spend the $80 on that right now. I learned on the Nordstroms parts car that getting that seal off can easily lead to breakage; don’t need that. Later on, when I do replace the seal, I figure I can get it off, get the channel thoroughly cleaned out, and paint under there with full-strength paint. The hood channel along the fenders has several exposed bolt heads, and I don’t want to get a bunch of paint gooped up around them, so I’m painting that as I go now. It’s looking fairly well covered with four coats.

I’ve been busy enough with the paint and the holiday and other stuff that I haven’t even thought about the trim yet; all the stuff that is going back on is gonna look really tacky if I don’t do something with it. The black plastic pieces on the bumper and the mirrors are pretty badly faded, and the aluminum bumpers are a little scuffed. I’ll need to spend a little time cleaning them up and trying to restore some depth to the black plastic. Not sure if I’ll paint the plastic or see if there’s some kind of restorative goop that will help; I’m thinking the paint will be the fastest/cheapest option, but I also don’t want it to crack & run on me, so the jury is still out on that.

Another issue I’m having is with my mixed paint; I started out by mixing the paint & mineral spirits in a plastic container that I found in the house, and for the first few days it worked fine for storing the paint. But the last couple of times I’ve opened the container the paint has had a skin on its surface. I haven’t been successful in keeping the bits of skin out of the paint, and have had to pick several pieces off the car that I didn’t get off the roller. I think the the plastic is being affected by the paint and allowing some air to pass through, drying the paint on the surface. I should’ve stored the paint in the original can or a better container, but I didn’t want to spend the extra couple of bucks for that; lesson learned. I think I’ll stop by the store tonight & pick up a container, then use some cheesecloth to strain the chunks out of the paint. And mix another batch, which will be needed because I just remembered that I forgot to pour the paint from the tray back into the bucket! Dang!

Sorry; no photos yet, but I’ll get some tonight and put them up next time.

To read the rest of the story and see the final product in pictures, click here. Enjoy!

A Cheapskate’s Paint Job

Saturday, July 4th, 2009

To read the rest of the story and see the final product in pictures, click here and here. Enjoy!

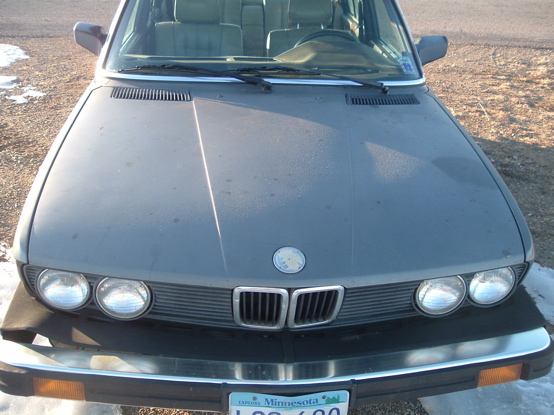
When I bought my BMW 528e in January, one of its more obvious deficiencies was the paint; one of the previous owners had had it resprayed for what must have been a good reason, but whoever did the work did an absolutely lousy job of prep work before the painting, and even the paint left a lot to be desired. The paint had not been given a clear coat, and a few years of neglect had taken its toll.

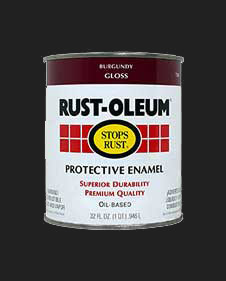
Having paid only $800 for the whole car, having it professionally painted didn’t seem to make a lot of sense, since a decent paint job would probably cost twice the purchase price. So an alternative was in order. I had picked up an issue of Hot Rod Paint & Body a while back that had an article in it describing how to Paint A Car With A Roller For Only $98 — they used multiple coats of Rustoleum paint thinned way down to the consistency of milk — and that seemed interesting.

Searching around on the Internet yielded what seemed to be the origin of that concept on a moparts.org thread that was started back in 2006. Someone was looking for a cheap affordable way to paint a car, and one of the users chimed in with this method. He said he had painted a number of cars this way before, and the photos of a ’69 Charger he linked to were pretty impressive.

I figure with the BMW, I don’t have much to lose; it needs paint, and I can either try this or pay an arm & a leg for a real paint job. If I try this and it doesn’t turn out, I can resort to plan B… So I dove into the project headlong last week. The next-door neighbor was going to be out of town for a few weeks, and I got permission from her to use her largely-unused large garage while she was away. I had originally planned to just work on mechanicals, but a brief discussion of the subject with Yvonne convinced me that I ought to go ahead with it. I picked up some Rustoleum Burgundy at Menards, along with some high-density foam rollers and a few other needed items, and set to work.

My decision to go with something other than the original color, and a non-BMW color at that, probably won’t earn me any brownie points with the mye28.com purists, but who cares. I chose that color because I like it, and because Bryce liked it, and it just may end up in his possession sometime soon (more on that later.)

As expected, much of the time in the last week was spent on prep work; stripping trim, bumpers & lights off of it, fixing the odd issues with the paint, and sanding it all down. Looked pretty scary after the sanding was done! But that was nothing compared to what it looked like after the first coat of paint. The author of the Hot Rod article (Christopher Campbell) wrote, “That first roll is by far the worst part, and the finish that greets you immediately afterward will likely make you want to reconsider the whole affair, but keep the faith!” Wow was he right; that first roll I laid down yesterday looked absolutely awful and gave me a pit in my stomach. I was so discouraged I didn’t even take any pictures of it.

So far, I’ve got two coats on it, and I have to say that with the second coat it’s looking better. There are runs in it, and lots of other imperfections that I probably haven’t yet seen, but all that will get fixed with sanding and additional coats. I hope. I probably should have sanded tonight, but it was raining all day, and the boys and I went to see a movie, and it was dark by the time we got back, and the lighting in the garage is less than wonderful, and… Ok, so I mostly didn’t feel like it. But I’ll do it first thing in the morning, let it dry a while, then put on the third coat. With any luck it’ll be dry by tomorrow night & ready for a fourth coat tomorrow evening. No photos yet, but I’ll take some in the days to come. Watch this space for updates!